

Tel : +86-760-89921987
Fax : +86-760-88483779
Views: 0 Author: Site Editor Publish Time: 2026-07-07 Origin: Site


An open wet room can look effortless, yet a poorly placed screen may leave water around the vanity, toilet, or doorway. The problem is rarely the glass alone. Showerhead direction, panel width, floor slope, drain position, and waterproofing all influence how well the space performs after daily use.
Choosing wet room shower screens therefore starts with understanding how water moves through the room. The sections below examine screen layouts, drainage choices, glass finishes, framing, and measurement details so readers can select a design that balances splash control, access, privacy, and long-term maintenance.
Begin by marking the showerhead location, spray direction, standing area, and reach of any handheld shower. Then identify the vanity, toilet, doorway, towels, storage, electrical fittings, and other elements that should remain outside the primary wet zone. This usually provides a more useful basis for screen placement than dividing the bathroom according to visual symmetry.
The panel should extend beyond the normal spray path so that it intercepts droplets before they reach the circulation area. Directing the showerhead toward a tiled wall can reduce the amount of glass required, while a head facing the opening needs greater coverage. Broad rainfall heads, high water pressure, and movable hand showers may also create a larger splash zone than a floor plan suggests.
For this reason, wet room shower screens should be positioned around real showering behaviour. A visually balanced panel is of little value when water regularly travels around its open edge.
A single fixed panel works well where spray direction is predictable and the room provides a comfortable entrance. If water can reach a nearby vanity or toilet from the side, adding a short return panel improves containment without creating a fully enclosed cubicle.
Hinged sections are useful when the opening occasionally needs to be widened for cleaning, assisted showering, or family use. Sliding screens suit tighter bathrooms because they do not require outward swing space. Fixed, folding, swing, and sliding bath-screen configurations allow the opening method to respond to different layout and clearance requirements.
The choice should therefore be based on water direction and available movement space, not appearance alone. A more complex screen is unnecessary when a correctly positioned fixed panel can perform the same job.
An open design may still feel cramped if users must turn sharply around the glass or squeeze between the screen and another fixture. Check the proposed opening against the toilet approach, vanity drawers, bathroom door, towel rail, seating, and grab bars.
Entry width should support comfortable movement, routine cleaning, and any expected assisted use. Floor tracks and raised thresholds should be minimized in level-access bathrooms because they can interrupt circulation and create trip points.
The best wet room shower screens contain the active spray without making the room harder to navigate. If the panel protects the floor but blocks daily movement, its size or position needs to be reconsidered.
The floor must carry water toward the drain; the screen only controls airborne spray. Flat areas, reverse falls, and low points near the entrance can leave standing water or send it into the intended dry zone.
A finished shower floor generally needs a consistent slope toward the drain. For many residential projects, a slope of approximately 2% to 4% provides a useful planning range, although the final construction must follow the applicable local code and selected drainage system. The drain must also form a watertight connection with the surrounding floor assembly.
Floor geometry affects the tile layout, bottom edge of the panel, fixing positions, and level-access transition. When separate drainage planes meet directly beneath the glass, uneven gaps and difficult sealing details may result. Wet room shower screens should therefore be measured after the floor build-up and drainage planes have been confirmed.
A point drain receives water from several directions and usually requires multiple sloping floor planes. This can lead to more tile cuts, particularly when large-format tiles are used. A linear drain can support a simpler single-direction fall and may create a cleaner transition across the shower area.
Neither layout is automatically superior. Joist direction, plumbing access, available floor depth, tile dimensions, shower output, and existing drainage connections all influence the practical choice.
Position is equally important. A drain along the shower wall or at the rear of the wet zone collects water close to its source. One placed beside the panel may help intercept runoff moving toward the opening, provided the surrounding floor still falls consistently. An entrance-side drain requires particularly careful design so that it does not create an unwanted channel, raised edge, or awkward change in floor level.
The glass should sit within this drainage plan rather than dictate it. Placing the screen beyond the effective fall may trap water on the wrong side, while positioning it too close to the showerhead can reduce usable space without improving drainage.
Tiles and grout form the visible finish, but they should not be treated as the primary waterproof layer. Protection must remain continuous across the floor, internal corners, wall-to-floor junctions, pipe penetrations, drain connections, and areas beyond the open edge that may receive overspray.
A reliable shower assembly requires a watertight connection between the waterproofing layer and the drainage outlet. The completed membrane may also need to be inspected or tested before tiles and other finished surfaces are installed.
Glass fixings must be coordinated with this system. Wall channels, clamps, and support bars need suitable structural backing, while penetrations must be sealed according to the hardware and waterproofing specifications. Drilling through a finished wet-room floor should be avoided or planned before the membrane is installed.
Waterproofing should extend beyond wet room shower screens because an open entrance will occasionally receive overspray. Ventilation supports drying, but it cannot compensate for an incomplete membrane or poorly sealed drain.
A successful arrangement follows a clear sequence. The showerhead directs most water into the designated wet zone, the glass interrupts the primary spray path, and the sloping floor carries surface water toward the drain.
Planning factor | Question to answer | Effect on screen design |
Showerhead direction | Does the spray face the opening? | Determines the required panel coverage |
Floor fall | Does every wet surface drain correctly? | Prevents water migrating beneath the screen |
Drain position | Where will the highest water volume collect? | Guides the screen and shower-zone position |
Waterproofing boundary | How far could overspray travel? | Defines the protected floor and wall area |
Entry location | Could water reach the doorway? | May require a return panel or revised layout |
Weakness in one element increases the burden on the others. A wider panel may reduce direct splash, but it cannot solve standing water caused by a flat or incorrectly sloped floor. When water repeatedly reaches the doorway, revise the spray direction, drainage plan, or panel position before adding more glass.
Shower glazing is installed where slipping or accidental human contact may occur, so ordinary annealed glass is unsuitable. Tempered safety glass is commonly used because it is stronger than untreated glass and is designed to break into smaller fragments rather than large, sharp pieces.
The correct glass specification depends on the panel’s height and width, the amount of framing, wall construction, fixing method, and use of support bars. Large frameless panels generally require greater rigidity and more substantial anchoring than smaller framed screens. Consequently, one standard thickness should not be applied to every wet-room design.
Glass should comply with the safety-glazing requirements of the destination market. Buyers should verify the certification, permanent markings, glass thickness, and test standards for the exact screen being ordered.
Glass option | Main advantage | Main trade-off | Suitable setting |
Clear glass | Maximizes light and visual space | Water marks remain visible | Compact or design-focused bathrooms |
Frosted glass | Provides greater privacy | Reduces visual continuity | Shared bathrooms |
Tinted glass | Adds depth and contrast | Can darken the shower zone | Larger or dramatic interiors |
Patterned glass | Adds texture and privacy | May compete with detailed tiles | Decorative bathroom schemes |
Easy-clean treated glass | Slows routine buildup | Still requires regular care | Hard-water or high-use bathrooms |
Clear glass preserves sightlines and keeps decorative tilework visible, which can help a small bathroom appear less divided. Frosted and patterned finishes provide greater privacy for family or shared bathrooms. Tinted glass works best where the room has enough light to support a darker visual treatment.
Easy-clean coatings can reduce the effort required to remove mineral deposits and soap residue, but no coating makes wet room shower screens maintenance-free. Cleaning habits, water hardness, privacy requirements, and compatibility with approved cleaning products should all influence the final choice.
Frameless screens create minimal visual interruption and have fewer metal joints where residue can collect. Their clean appearance depends on accurate measurements, rigid glass, appropriate support, and walls capable of accepting the fixings.
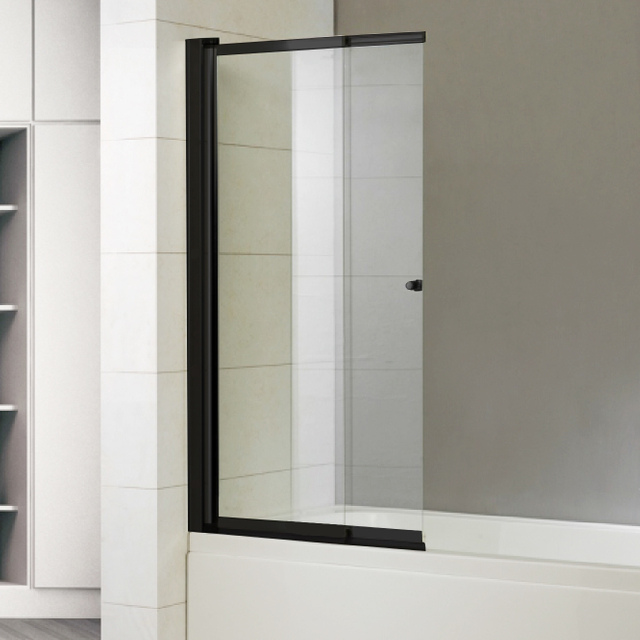
Semi-framed screens use profiles around selected edges, providing limited installation adjustment while maintaining a relatively open appearance. Black-framed screens introduce a stronger outline that can coordinate with dark taps, handles, and bathroom accessories. The additional profiles and tracks, however, create more surfaces that require cleaning.
A black sliding bath screen combines architectural framing with space-saving movement. Such an arrangement may be useful where an outward-swinging section would interfere with a vanity, toilet, or doorway.
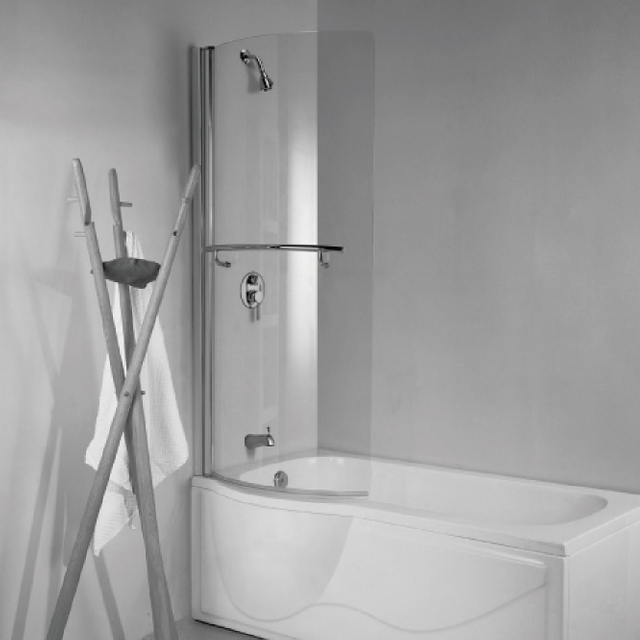
Well-designed wet room shower screens depend on more than glass style. Screen position, showerhead direction, floor slope, drainage, waterproofing, safety glazing, and accurate measurements must work together to control water while preserving comfortable access. Clear, frosted, framed, and frameless options should be selected according to privacy, maintenance, room size, and structural requirements.
Zhongshan Himalaya Bathrooms Co.,ltd. offers bath screens, shower enclosures, and customizable manufacturing support, giving buyers practical options for different layouts and project specifications. A coordinated choice can reduce splash problems, simplify daily use, and create a cleaner, more functional wet room.
A: Not completely. They reduce direct spray, but effective water control also depends on showerhead direction, panel width, floor slope, drainage, and waterproofing around the wet zone.
A: The right width depends on the opening, showerhead position, spray pattern, and required entry space. The panel should contain normal splash without making access narrow or awkward.
A: Yes. A consistent fall toward the drain prevents standing water and migration into dry areas. Glass controls airborne spray, but it cannot correct a flat or reverse-sloped floor.
A: Tempered safety glass is normally used for shower applications. Clear glass maximizes openness, frosted glass improves privacy, and treated surfaces can make mineral deposits and soap residue easier to manage.
A: Frameless screens create a lighter look and fewer joints, while framed options offer stronger visual definition and some installation adjustment. Support, wall condition, cleaning, and room style should guide the choice.
A: Yes, provided the layout protects nearby fixtures and preserves a comfortable entry. In compact rooms, showerhead direction, panel placement, and drain position matter more than choosing the largest possible screen.


Tel : +86-760-89921987
Fax : +86-760-88483779