

Tel : +86-760-89921987
Fax : +86-760-88483779
Views: 0 Author: Site Editor Publish Time: 2026-06-08 Origin: Site


Hinged shower doors transform your bathroom’s look and function instantly. But installing them can be tricky without the right know-how.
In this post, you’ll learn what hinged shower doors are and why they’re a great choice. We’ll also cover key differences between frameless and framed styles.
Finally, we’ll guide you through installing hinged shower doors like a pro in just 7 easy steps.
Installing hinged shower doors requires the right tools and materials. Having everything ready before you start saves time and ensures a smooth process.
Accurate measurements are crucial. Use a high-quality tape measure to record the width, height, and clearance of the shower opening. Measure multiple points—top, middle, bottom—to catch any irregularities.
A level helps confirm walls and surfaces are vertical and horizontal. This ensures the door hangs straight and swings properly. Both a long level and a smaller torpedo level can be useful for different areas.
A power drill with appropriate drill bits is essential for making pilot holes, especially on tiled or concrete walls. Use a masonry bit for tile or concrete, and a wood bit for drywall or studs.
Screwdrivers—both Phillips and flathead—help fasten hinges and hardware. An impact driver can make tightening screws easier but use caution to avoid overtightening.
Wall anchors provide extra support when screwing into drywall or hollow walls. Choose anchors rated for the weight of the glass door for safety.
Use high-quality, mold-resistant silicone sealant to waterproof joints between glass, walls, and shower bases. A caulk gun makes application easier and more precise.
Hardware typically includes hinges, handles, screws, and sometimes brackets or support bars. Confirm all components match the door type and manufacturer’s specifications.
Safety goggles protect your eyes from dust and debris during drilling. Gloves help you grip glass panels securely and protect your hands from sharp edges.
Wear work clothes and sturdy shoes. Clear the workspace of any obstacles, and have a helper assist with lifting heavy glass panels. Proper preparation reduces risks and ensures professional-quality installation.
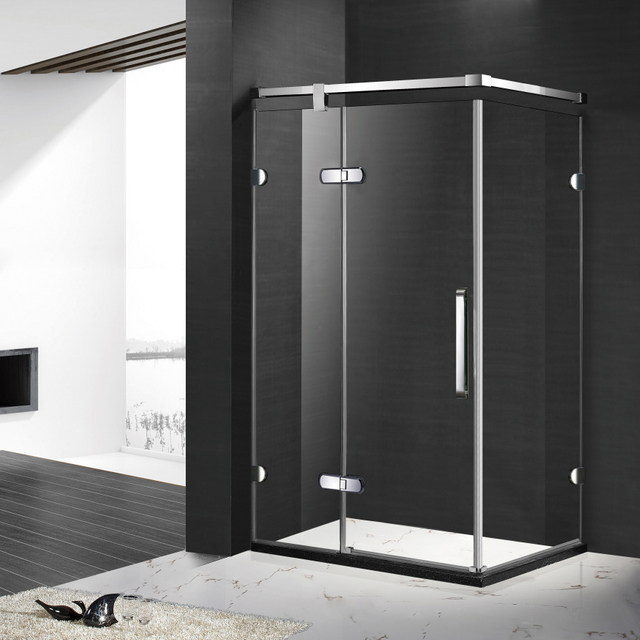
Accurate measurement is the foundation for a perfect hinged shower door installation. Getting the right dimensions ensures the door fits well and swings smoothly without leaks or gaps.
Start by measuring the width of the shower opening at three points: top, middle, and bottom. Walls and tiles may not be perfectly straight, so use the smallest width to avoid ordering a door that won’t fit.
Next, measure the height from the shower threshold or base to the desired top of the door. This height affects both the door's coverage and the clearance for the door swing.
Finally, consider clearance for any obstacles like showerheads, shelves, or trim. These can interfere with the door’s movement or sealing. Measure the distance from the wall or frame to these obstructions carefully.
Creating a measurement template helps visualize the shower opening and avoid mistakes. Cut a piece of cardboard or stiff paper to the approximate size of the opening. Mark the top, bottom, and any irregularities or obstructions on it.
Use diagrams to record your measurements clearly. Include notes on wall plumbness, tile thickness, and any uneven surfaces. This documentation will guide the glass fabricator and installer.
Ignoring wall irregularities: Walls are often out of plumb. Measuring only at one height can cause the door to bind or gaps to appear.
Forgetting clearance: Overlooking shelves or showerheads leads to doors that won't open fully.
Not measuring multiple points: Only measuring the top or bottom width can cause ordering errors.
Rushing measurements: Hastiness increases the risk of errors that cause costly delays.
Always measure twice or even thrice. Use different tools like a tape measure and a level. Verify that your recorded numbers match the physical space.
Double-checking reduces costly mistakes and ensures the door fits perfectly. It also helps installers avoid on-site adjustments and reorders.
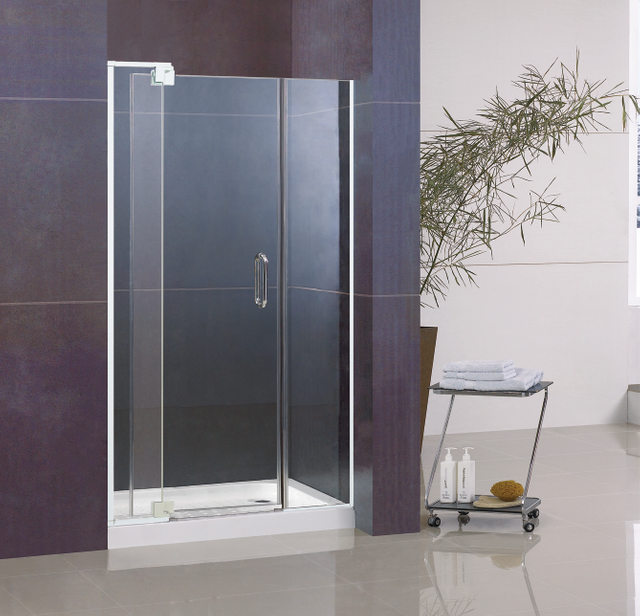
Start by clearing the shower area of any obstacles, including old doors, curtains, or debris. Clean the walls and shower base thoroughly to ensure a dry, dust-free surface for installation. Next, check the walls for plumb using a level. Walls often have slight imperfections, but significant deviations can cause door misalignment. If walls are noticeably out of plumb, consider shimming or adjusting during hinge installation to compensate. Also, inspect the shower base for levelness; an uneven base can cause sealing issues or door misfit.
Using your measurements and templates, mark the precise locations for the hinges on the wall and glass door. Use a pencil or painter’s tape to avoid permanent marks on tiles. Double-check these marks with a level to ensure vertical alignment. Drill pilot holes carefully, especially on tile surfaces, using the correct drill bit to avoid cracking. Insert appropriate anchors if mounting into drywall or hollow walls. Attach the hinge plates securely to the wall, following manufacturer torque specifications to prevent damage or loosening. For the glass door, align hinge holes and fasten hinges gently but firmly, ensuring no stress on the glass.
With help, lift the glass door and position it onto the wall-mounted hinges. Confirm the door swings freely without obstruction. The door should open outward or inward according to your design, typically swinging outward for safety and space. Check the clearance between the door and any nearby fixtures, walls, or shower components. Adjust hinge tension or position slightly if the door binds or swings unevenly. Ensure the door closes flush against the frame or wall, creating a tight seal to prevent leaks.
Install the door handle according to the hardware instructions. Use the provided screws and avoid over-tightening to prevent glass stress. After hardware installation, apply a bead of mold-resistant silicone sealant along the door edges where glass meets walls, base, or fixed panels. Use a caulking gun for smooth, controlled application. Smooth the sealant with a wet finger or tool for a neat finish. Be careful not to block door movement or drainage areas. Allow the sealant to cure fully—usually 24 hours—before using the shower.
Once the door is hung and sealed, perform a final inspection. Use a level to verify the door is plumb and the gaps around the door are even. Adjust hinge screws or shims as needed to correct any misalignment. Test the door several times to ensure smooth operation and consistent closure. Tighten all hardware securely but avoid overtightening. Check for any leaks after the sealant cures by running water in the shower. Address any issues promptly to maintain door performance and longevity.
Tip: Always enlist a helper when hanging heavy glass doors to ensure safety and precise alignment during installation.
When choosing hinged shower doors, understanding the differences between frameless and framed options helps pick the best fit for your bathroom style and needs. These two types vary in design, installation, durability, and cost.
Frameless shower doors feature thick tempered glass panels held by minimal hardware such as hinges and clamps, creating a sleek, modern look. They offer a clean, open feel, making bathrooms appear larger and brighter. Without bulky frames, water spots and grime have fewer places to collect, simplifying cleaning.
Framed shower doors have metal frames surrounding the glass panels, providing a more traditional appearance. The frame outlines the door and often includes tracks or channels. This style can suit classic or utilitarian bathroom designs and may visually segment the shower space more than frameless doors.
Frameless doors require precise measurements and careful installation. The glass is thicker and heavier, relying on hardware for support. Walls must be plumb and level to avoid stress on the glass. Installation demands skill to ensure proper alignment and sealing, often making professional help advisable.
Framed doors are generally easier to install. The metal frame provides structural support, which can compensate for minor wall irregularities. Installation is more forgiving, making framed doors a good choice for DIY projects or less-than-perfect openings.
Frameless doors use thicker tempered glass, which is strong but can be vulnerable to impact if mishandled. Their minimal hardware reduces components that can corrode or wear out. Cleaning is easier since there are fewer crevices for soap scum or mold.
Framed doors have more parts exposed to water and soap, such as frame channels and seals, which may require regular cleaning to prevent buildup. Frames can corrode or discolor over time, especially in harsh water conditions. However, framed doors tend to be sturdy and durable due to the metal support.
Frameless doors usually cost more due to the thicker glass and specialized hardware. Their modern aesthetic and ease of cleaning make them a popular upgrade that adds value to bathrooms.
Framed doors are more budget-friendly and easier to replace or repair. They offer solid performance and can suit a wide range of bathroom styles.
Opting for professional installation is wise if you lack experience handling heavy glass or precise measurements. Complex shower openings, uneven walls, or custom glass panels increase installation difficulty. Professionals bring expertise, reducing risks of glass damage or improper fitting. If your project involves frameless doors or large panels, hiring experts ensures safety and quality.
Professionals follow strict safety protocols during installation. They use appropriate tools and techniques to handle glass safely, preventing breakage and injury. Trained installers ensure hinges and hardware are securely anchored, minimizing accident risks. They also comply with local building codes and safety standards, which DIYers might overlook.
Professional installation often includes warranties covering workmanship and hardware. This guarantees repairs or replacements if issues arise post-installation. Manufacturers may void product warranties if doors are self-installed incorrectly. Choosing experts protects your investment by ensuring proper fit, sealing, and function.
To get an accurate quote, gather detailed shower measurements, door style preferences, and any special requirements. Contact reputable glass companies or installers with this info. Ask about lead times, warranty terms, and installation processes. Clear communication helps contractors provide precise estimates and tailored solutions.
Tip: Always opt for professional installation when dealing with frameless or custom glass doors to ensure safety, warranty protection, and a flawless finish.
Leaks often happen when seals wear out or gaps form between the door and the wall or base. Check the silicone sealant around the edges for cracks or breaks and reapply if needed. Misalignment can cause the door to not close properly, leading to water escaping. Inspect hinges for looseness or sagging, and tighten or adjust them to restore proper alignment. Sometimes, shims behind hinges help correct uneven walls or door sag.
If leaks persist despite resealing and hinge adjustment, examine the door sweep (the strip at the bottom). Replace it if damaged or worn. Also, ensure the door swings fully closed without gaps. Regularly test the door’s operation to catch issues early.
Clean glass doors weekly using mild, non-abrasive cleaners or a mixture of water and vinegar. Avoid harsh chemicals that can damage glass coatings or metal hardware. Use a soft cloth or sponge and rinse well to prevent residue.
Wipe down doors after each shower with a squeegee or microfiber cloth to reduce water spots and soap scum buildup. Pay attention to corners and edges where grime tends to accumulate. For hardware, dry with a soft cloth to prevent corrosion, especially in humid bathrooms.
Hinges and seals wear over time due to moisture and use. Signs include squeaking, door sagging, or water leaks. Replace hinges in matching styles and finishes to maintain door function and appearance. Use manufacturer-recommended parts when possible.
Seals, including door sweeps and perimeter gaskets, should be inspected every few months. Remove old silicone carefully before applying new mold-resistant sealant. Proper sealing extends door life and prevents water damage to walls and floors.
Choosing the right hardware finish complements your bathroom style and affects maintenance.
Chrome: Popular for its shiny, reflective surface. Easy to clean but can show water spots.
Brushed Nickel: Offers a matte, warm look. Resists fingerprints and water marks well.
Oil-Rubbed Bronze: Adds a rustic or vintage feel. Durable but may require occasional polishing.
Matte Black: Modern and bold. Hides fingerprints and water spots effectively but can show soap residue.
Select finishes that coordinate with faucets and fixtures for a cohesive look. High-quality finishes resist corrosion and wear longer in wet environments.
Achieving a professional hinged shower door installation starts with accurate measurements and using quality materials. Following precise steps ensures the door fits well and operates smoothly. Balancing DIY efforts with professional help can prevent costly mistakes and guarantee safety. Installing hinged shower doors enhances bathroom value by combining style and function. Zhongshan Himalaya Bathrooms Co.,ltd. offers reliable products that provide durability and modern design, making your installation both efficient and stylish.
A: Hinged shower doors are glass doors attached to the shower wall with hinges, allowing them to swing open and closed like a regular door.
A: Measure the shower opening’s width at top, middle, and bottom, the height from base to desired top, and clearance for obstacles to ensure the hinged shower doors fit perfectly.
A: Hinged shower doors provide a watertight seal, a sleek look, and easier cleaning compared to shower curtains, enhancing bathroom style and function.
A: Essential tools include a tape measure, level, power drill with bits, screwdrivers, wall anchors, silicone sealant, and safety gear for professional-quality hinged shower door installation.
A: Prices vary by style and size; frameless hinged shower doors tend to cost more due to thicker glass and hardware, while framed options are more budget-friendly.
A: Check and replace worn seals, reapply silicone sealant, and adjust hinges to ensure proper alignment and prevent water leaks around hinged shower doors.
A: Professional installation is recommended for safety, warranty protection, and precise fitting, especially with frameless or custom hinged shower doors.


Tel : +86-760-89921987
Fax : +86-760-88483779